
When I think back on my last decade of musical enjoyment, I sometimes think about how much the room played an impact in the music I was hearing. Was it “huge”? Or was it rather insignificant? I think the answer is that it was a bit of both. I’ve had systems setup in rooms as spaces as 5×7 (can’t really call that a room, can I?). On the flipside, my reference system was in a monstrous 1000 sq ft “great room” for several years. Being in a room now that’s roughly 10×16, I can truly appreciate the previous spaces I’ve had.
The finale to a three part series, I’d like to talk about the culmination of my experiences over the last few months, from the install to measurements and final speaker setup. Finally, I’ll share some closing thoughts and discuss if I’d do this again. Which, by the way, is a resounding’ish “yes”.
In my last two posts, I talked about the issues I had with my media room and my solution to fix it. In this final of the series, I’d like to cover the actual installation and how it all sounds. It’s been a few weeks since getting everything in place and I feel like I’m ready to discuss its effects on how I listen to music.
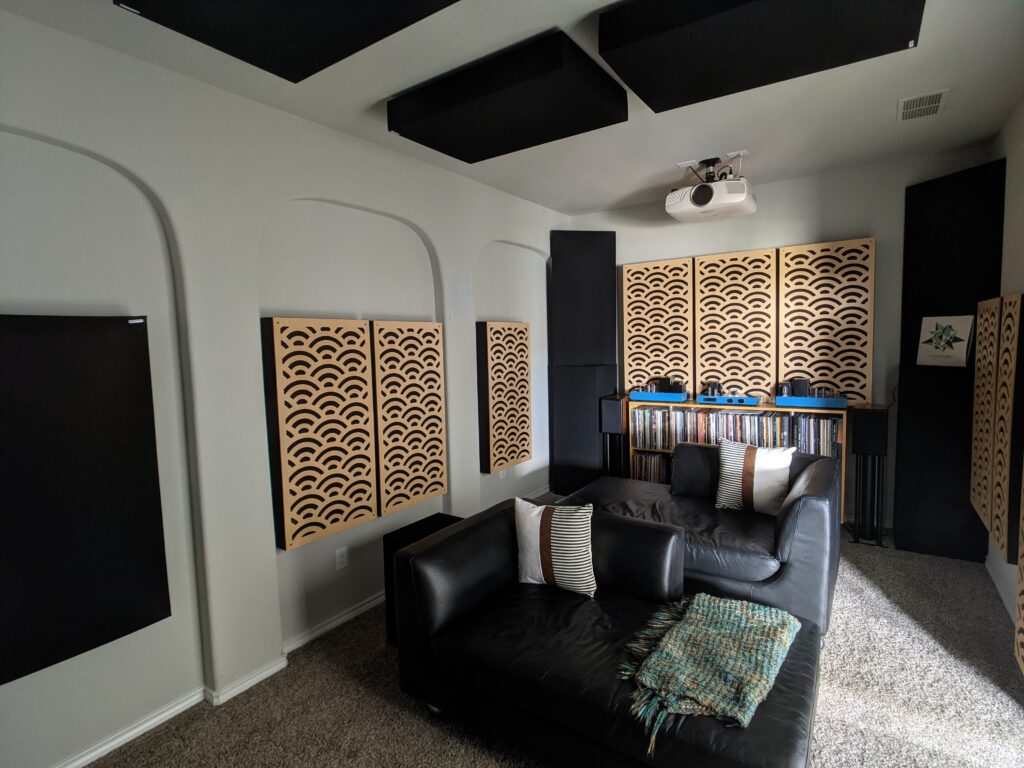
The Install

Before we get started, let me share a quick word of wisdom… it’s nice that GIK supplies hanging supplies, but you will be much better served by buying your own.
For Impression Panels, I recommend z-clips like these. Not only will it look professional, but you don’t have to get them perfectly centered since the clips are 4″ wide.
For alpha series panels or anything that needs the hanger wire, I went a little overkill but ended up purchasing these OOK 100lb hangers. Yea, perhaps a bit much but I can rest safely knowing they’re never coming down off those walls.
For ceiling panels, I used four of these J-Hooks per panel. The hooks are spaced 18″ apart forming a square, hanging about an inch down. The panels slide right on and hang 3/4″ off the ceiling.
Onto the installation. Ceiling panels aside, it was completed in a single afternoon, without much issue. The most difficult part, if I’m being honest, was remembering to do the mirror crawl to take care of first reflections on both the walls and ceiling. Though not required, we did make use of a laser level that made it far easier keeping the panels at the same height throughout the install.
There’s not much else to say. The install went as smoothly as you could ask for. I’d say the biggest surprise was how well the z-clips held the panels despite not being screwed into studs. I know, I know, that’s possibly a big no-no. We tried, but most of the panels are secured to the drywall. It’s been a few months, but everything still seems solid.
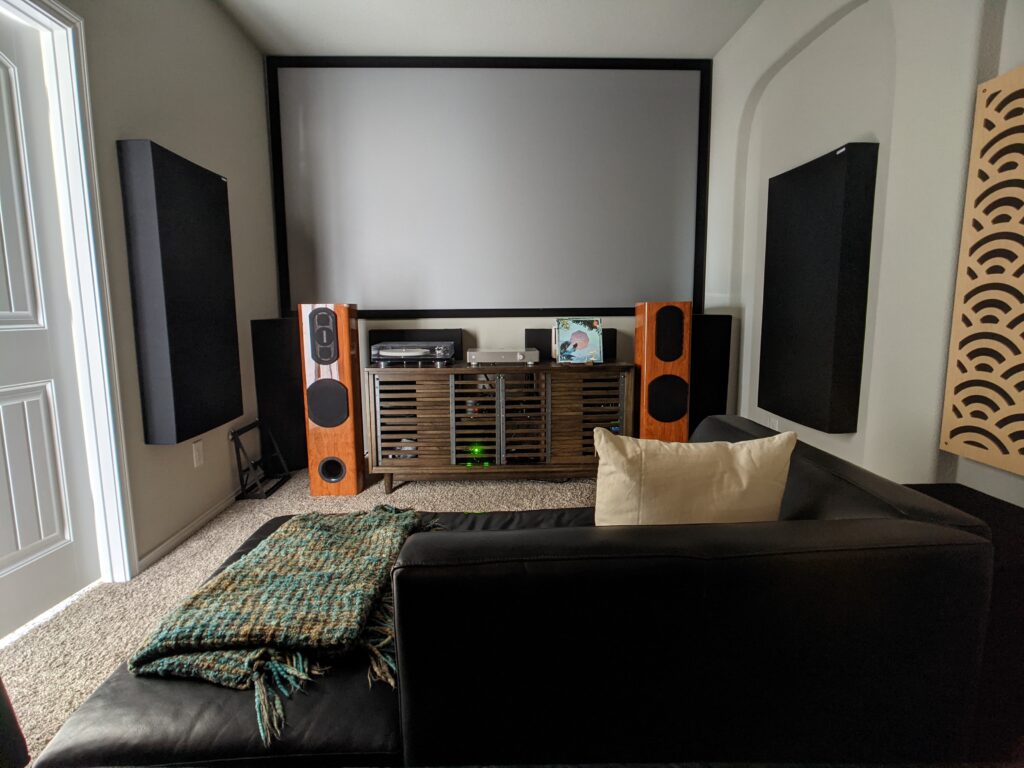
A small note for the video enthusiasts. Yes, room treatment still absolutely helps for movie playback. I installed a 135″ screen that’s probably too big for the space, but the family loves it. The room is wired for seven channel surround. Someday I’ll make time to crawl into the attic and install six height speakers. Someday.
General Notes
It goes without saying that stereo music makes up a majority of usage for the room. So, how does it sound with everything installed? Quiet. I’m not used to being in a room this quiet. It’s weird being in a room where the decay of a clap is instantaneous whereas before it lingered for a second or two.
Let’s run down my list of notes. When I am critically listening, I tend to shorthand my notes onto a notepad, sometimes in the dark. It usually takes a beverage to decode them, but I often like to tally the occurrence of key-words to get a sense or remembrance of what I was feeling at that time. That may sound weird, but no two listening sessions are the same for me. I can listen to the same track one day and get goose-bumps whereas the next will elicit no such response.
Anyways, back to the notes. An artist I tend to come back to for critical listening is Doug Burr. He’s a local artist, though I always go back for the tone of his voice and the sincerity in his lyrics and singing. It’s very heartfelt and something I can connect with since his music got me through some rough times.
- Wow – I wrote that twenty seven times. Sometimes multiple times per track.
- Focus – fifteen times. This means the soundstage was focused
- Bass – fourteen times. This doesn’t need any explanation
- Rear – nine times. This refers to how forward the soundtrack sounded.
- Wide – four times. Refers to the sound seemingly coming from beyond the speakers, in width or height
Here’s the kicker. I don’t really have notes from before panels. Don’t be disappointed though. The reason I started on this journey was because I was unable to listen to music in this room. It literally gave me a headache that made me hate the room. I regretted moving into this house and giving up the 1000 sq ft room I had before.
What I do have though is a suite of measurements befre and after panels. Both subjectively and objectively, I can safely say though that the room in its current state is truly wonderful. I don’t hate it anymore.
2-Channel Notes
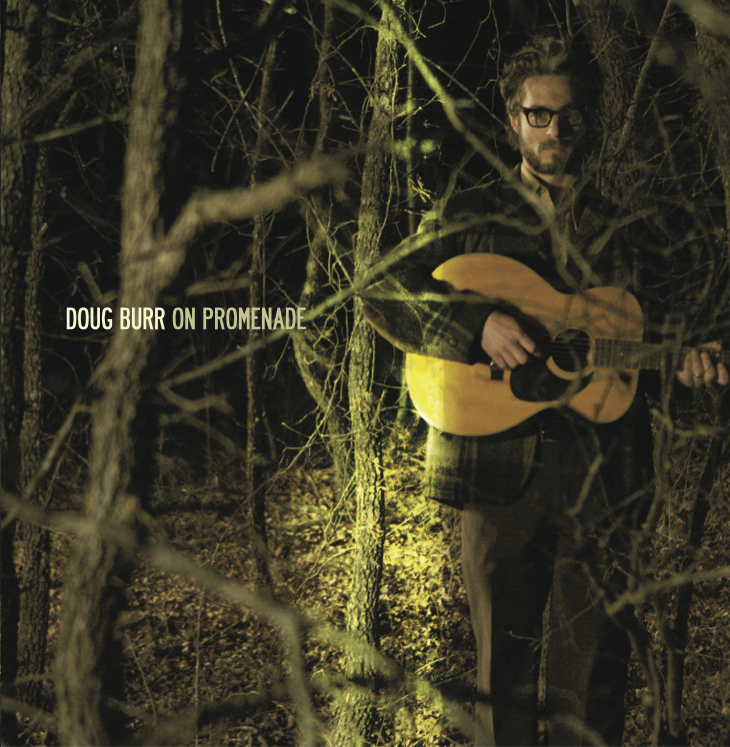
Let’s talk stereo. One of my de-facto reference albums is “On Promenade” by Doug Burr. Sure, it may not be the most technically profound album of all time, but it is one that I’m intimately familiar with. As I’ve mentioned in past posts, he’s a local artist that’s also one of my favorites. I remember entire bars going quiet when his music came on or when he started playing if it was a live show.
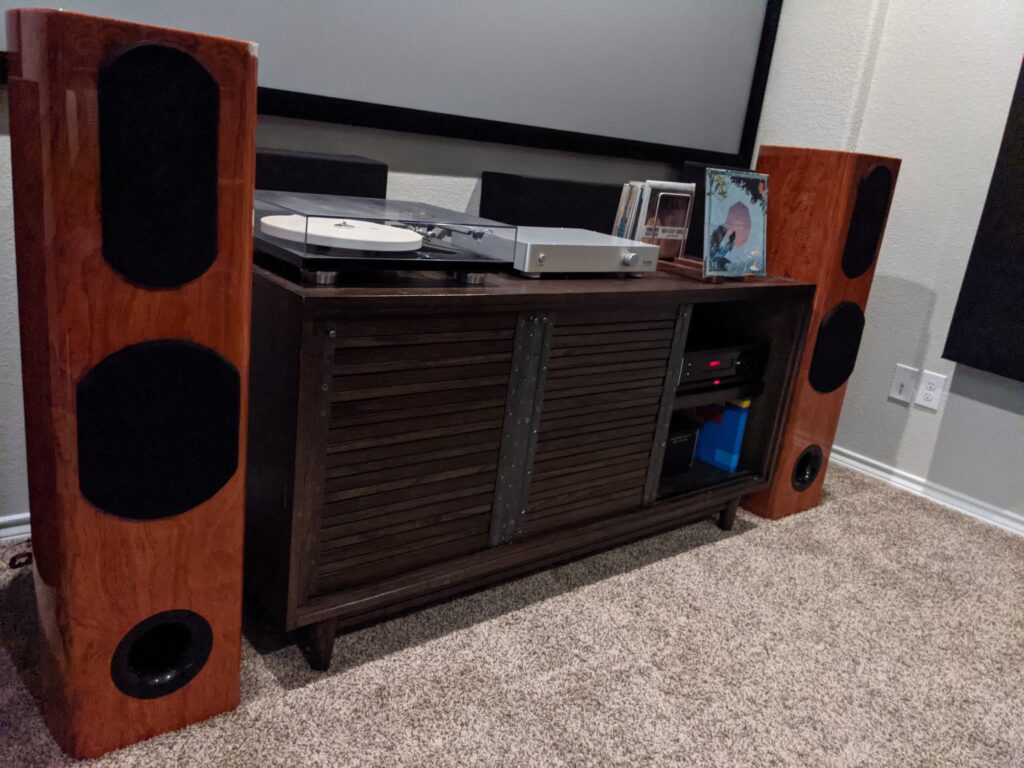
The opening track, “Slow Southern Home”, slowly builds up until the entire band comes in. Doug is centered with some vocals off to the right. His guitar-work always gives me goosebumps, but that was especially present here. As far as I can remember, this is the best this track has ever sounded to me. Nothing was out of place.
If you aren’t careful, “Graniteville” is a track that will make you tear up every time. This may sound strange, but I’ve never been in a room quiet enough to clearly hear his fingers slide across the neck of his guitar throughout the entire track. Yes, are some sections that are more prominent, but this was a first for the entire track.
As I made my way through the album, it became evident what the real benefit of panels are. For me, it’s not controlling reverb or reflections. It’s lowering the noise-floor to the point that I could hear the artist breath and tell exactly what and where they are. It was almost shocking.
Movie Notes
This section will be fairly quick.
Most of my notes from 2-channel apply here. But now we have more speakers! As mentioned earlier, the room is setup for 7 channel surround, but in my case I’m using a phantom center. As the room is fairly narrow, I think this works just as well as having a dedicated center unit.
The movie of choice (thanks to my kiddos) was Toy Story 4. I’ve always read that surround speakers are meant to enhance the front speakers, not distract from. Since the only other time I’d ever heard surround was at the theaters, it was a little jarring at first hearing sounds from the sides and rear.
I say jarring, but after a few minutes, it transformed into pure enjoyment. Goodbye theaters!
All I need now is a pair of subwoofers.
Final Measurements
Let me say that I’m not a REW expert. Nor am I necessarily well versed in how to accurately interpret the graphs below and how to change the speaker setup accordingly. That said, the measurements below are without any DSP applied. I did so to give the best representation of the sound of the room.
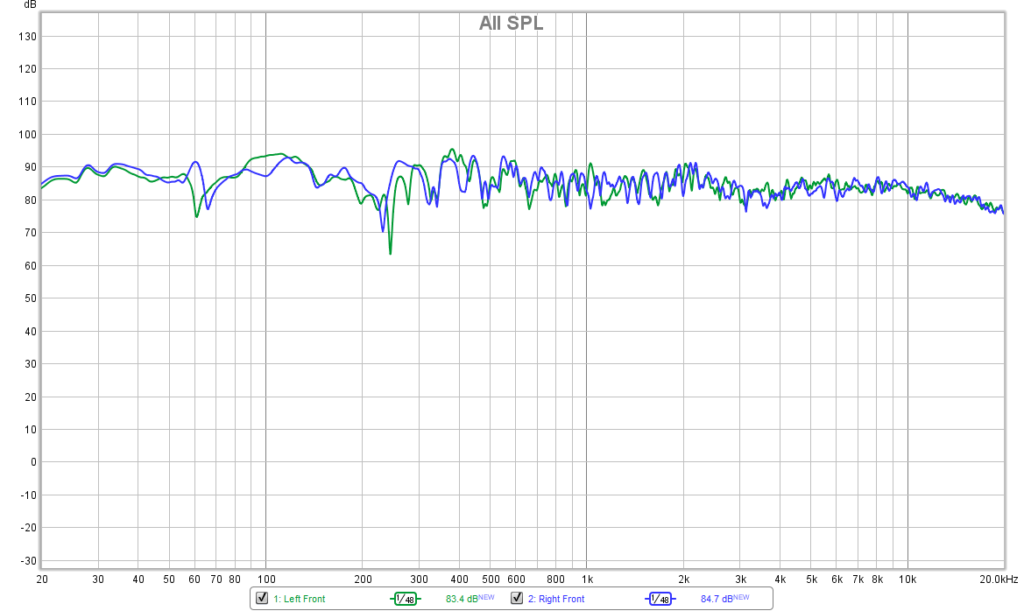
The biggest takeaway is that in the current listening position, the Schroeder Frequency is right around 250 Hz. I’m still researching how best to deal with this, so we’ll see where that ends up.
Next up are two different visualizations of decay and RT60. This is essentially a measurement of how quickly a certain frequency falls off in decibels or “loudness”. RT60 is a good way to quickly determine how open or “shut in” a room feels.
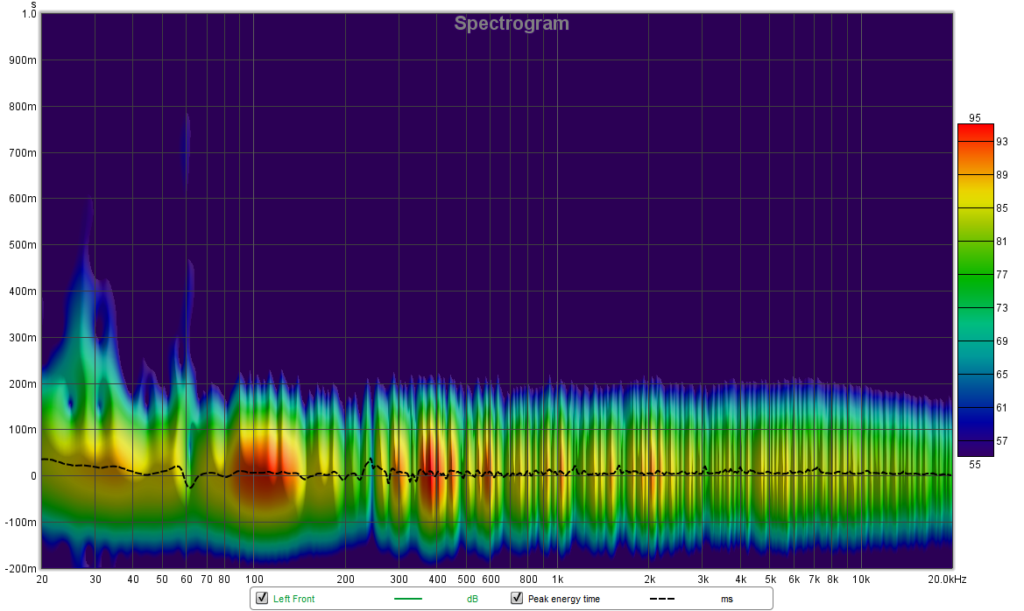
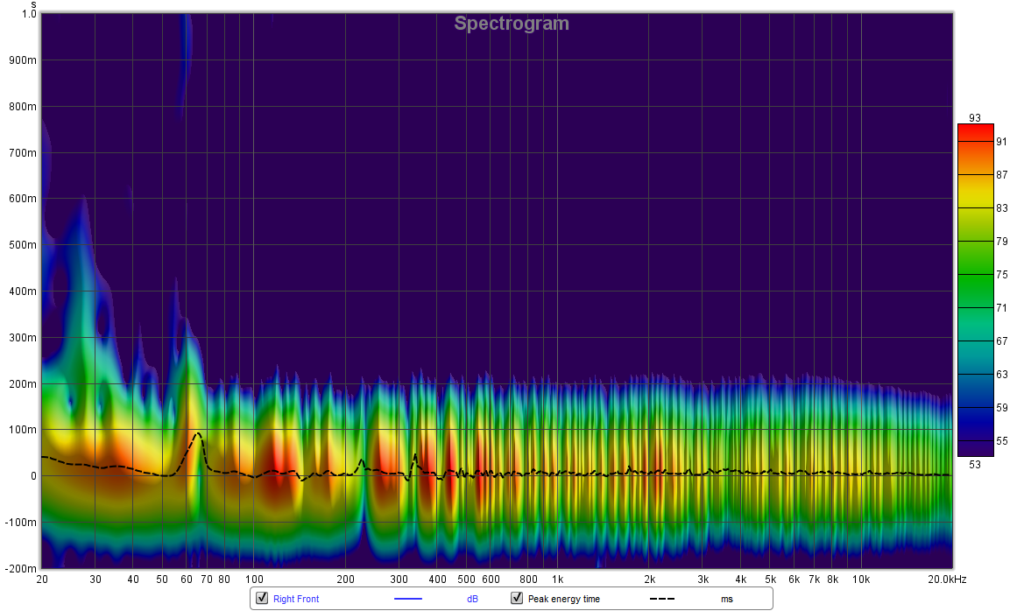
Essentially, everything above 70 Hz dies off in ~200ms. The same measurement before room treatment was in the 1 – 2 second range!
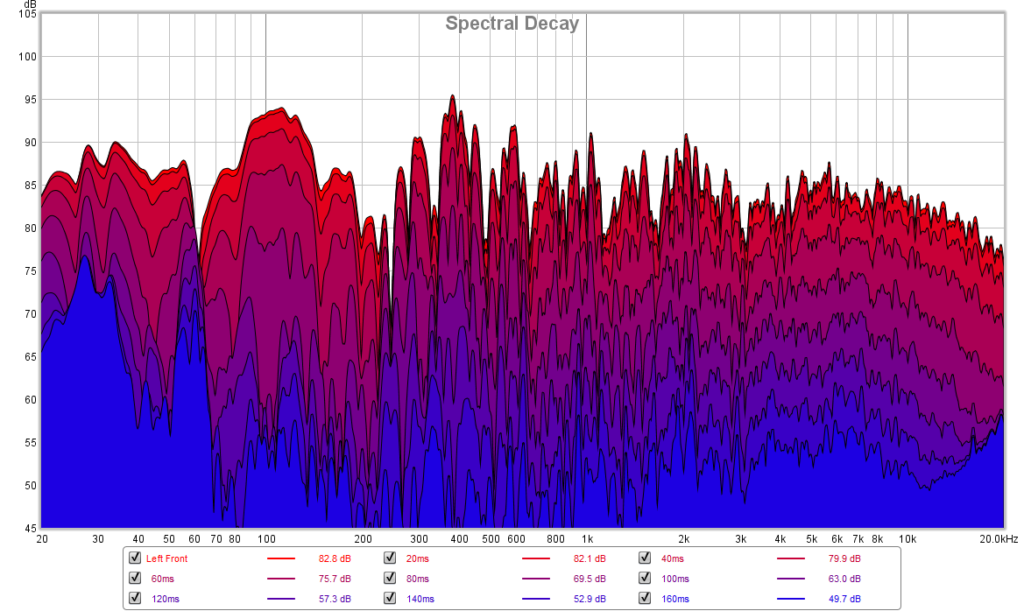
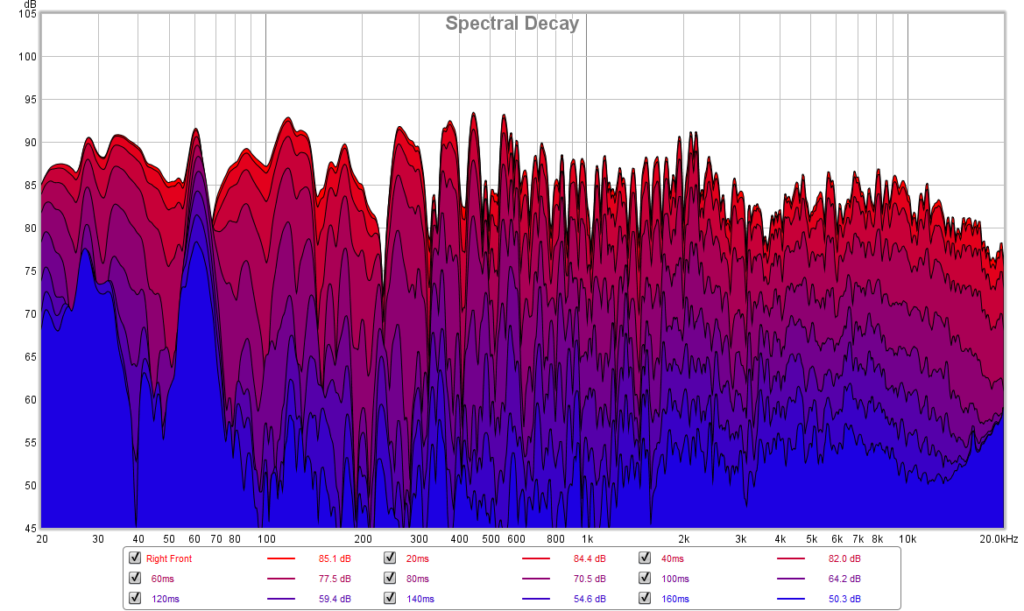
Now, what does this all mean? My goal was to get the decay time around 3-400 milliseconds. I’m coming in way below that, which does some interesting things to the sound. For one, I think the room qualifies as quasi-anechoic. In a sense, I believe most would consider it to be over-dampened.
This doesn’t mean that music is terrible to listen to. In fact, it’s quite the contrary. What it does mean though is that the soundstage may not be as wide or as deep as it could be with less panels on the wall. This simply means that I will need to experiment with removing some panels to see how it sounds.
I think this is a great start though. It still sounds far better than without any panels, but to some it may be overdone. As I continue experimenting and refining the setup, I will post updates here.
Closing Thoughts
It’s been a wild ride from measuring, working with GIK, ordering, and finally getting these installed. I’ve learned a lot along the way and feel like I’ve leveled up my audio knowledge and listening experience.
After going through all of this, I can easily conclude and agree with everyone online that the room is just as much a component as the rest of your system. While spending as much as me isn’t required, even some panels for early reflections can significantly improve the listening experience.
In all, I’m looking forward to my continued growth in this hobby. Until next time.